It is time to reveal one of the big projects we have been working on over the past month – a 3D Printed Chocolate Advent Calendar!
After collaborating at Brighton Mini Maker Faire, the guys at Moving Brands (MB) asked RepNap for our help in an ambitious end-of-year project of theirs – to print their very own chocolate advent calendar, each piece a personal motif designed by a member of staff, in 6 weeks.
As you can imagine, it took a significant amount of persuasion to get me to sign up for the challenge – all of about a millisecond’s worth.
Well, they did it, and with oodles of style!
Here’s the (slightly epic) story:
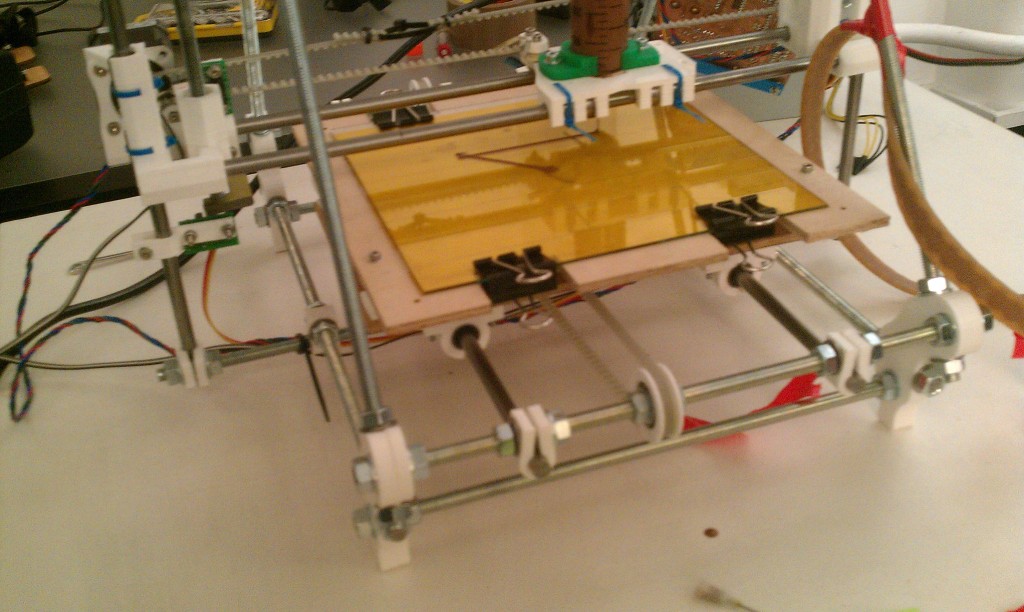
Exeter University’s chocolate 3D printer made a big splash in the news earlier this year, and I had heard about successful chocolate printing on a Fab@Home machine so knew it would be possible to reproduce on an open-source machine. The question was, what was the best approach for the limited time period we had? Makerbot do a syringe extruder called the Frostruder MK2, but would we be able to build and learn a Makerbot in time? In the end we settled on a Frostruder in combination with a Prusa, a machine we already had most of the parts for and could put together quickly, and which has a bigger print area for when all the chocolate is finished and normal PLA service is resumed. The big unknown in that solution was “Will the Frostruder fit on a Prusa?”.
Fast-forward a few weeks: the Frostruder has arrived from Makerbot, Dad and I have assembled a Prusa, and the team are all congregated at Moving Brands ready to get the show on the road. We had a plan of attack – train Daniel and Ben on using their Prusa with a plastic extruder, whilst we figure out how the heck to get the Frostruder fitted and working on our Prusa.

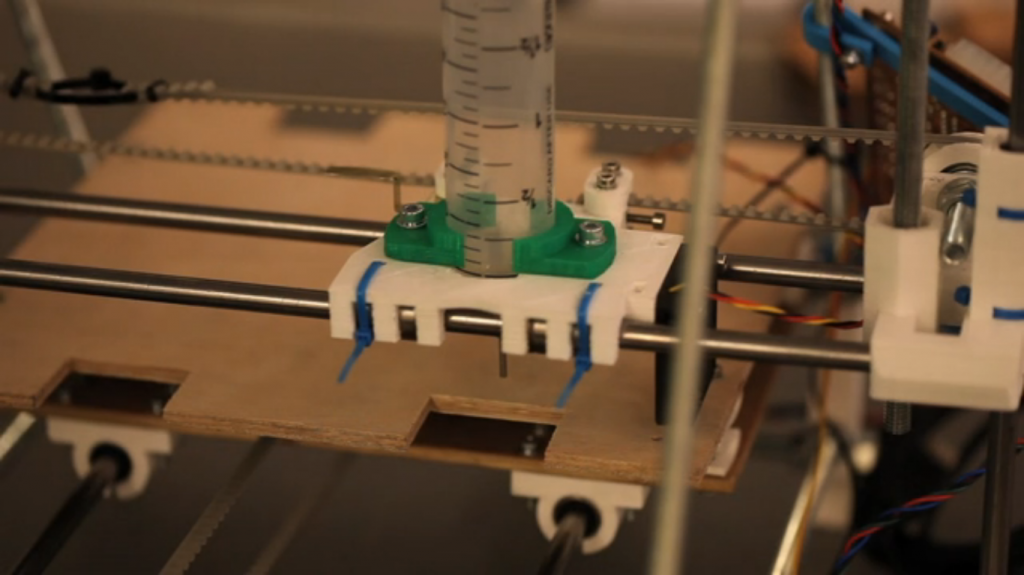
First issue – how to fit the Frostruder on a Prusa. Turns out the fully assembled Frostruder is a bit of a beast and barely fit in the frame. Luckily inspiration struck and we stripped away the majority of the plywood housing to leave the bare essentials – a syringe with an air in pipe connected to two valves. The pressure valve (P) lets in compressed air to cause extrusion, and the relief valve (R) lets the compressed air out of the pipe to normalise the pressure in the syringe, stopping extrusion.
We designed a custom syringe mounting clamp in OpenSCAD, printing it on the MB Prusa and mounted the solenoid valves on the frame.


Second issue – Driving the solenoids with RepRap electronics. We were using our Gen7 v1.1 electronics with Teacup firmware to drive the chocolate printing machine, which required some changes to the standard firmware configuration. The X, Y and Z axes are all controlled in the same way as when printing plastic. The differences are in the extruder controls.
The connections needed for each extruder are:
Plastic:
- Extruder heater MOSFET driven channel
- Heated bed heater MOSFET driven channel
- Fan MOSFET driven channel
- Extruder thermistor
- Heated bed thermistor
Frostruder:
- Pressure valve MOSFET driven channel
- Relief valve MOSFET driven channel
The valves require the same behaviour in firmware as the fan – they are either ON or OFF (as opposed to the heaters, which are controlled with PWM). This meant no coding for me, just replicating the fan control code in the valve control codes. Studying the Makerbot firmware for the Frostruder revealed that the GCode commands for controlling the valves are:
M106 – Pressure valve on
M107 – Pressure valve off
M126 – Relief valve on
M127 – Relief valve off
Turns out, the pressure valve commands are the same as for the fan in the plastic set-up, which means the pressure valve can be hooked up to the fan channel (FAN) with no change to the firmware. That said, I renamed it from fan to pressure, because I’m like that. One down, one to go!
The relief valve can be hooked up to either of the extruder heater (H1) or heated bed heater (H2) channels; I chose H2. The GCode commands M126/7 aren’t included as standard in the firmware, so these need to be created by duplicating the M106/7 sections and adjusting for the different GCode commands and MOSFET channel pin.
In summary,
Gen 7 Firmware changes:
- Remove thermistorsIn config.h, section
4. TEMPERATURE SENSORS:Comment out all lines beginningDEFINE_TEMP_SENSOR - Define valve MOSFET channelsIn config.h, section
5. HEATERS:ReplaceDEFINE_HEATER(extruder, PB4)
DEFINE_HEATER(bed, PB3)
DEFINE_HEATER(fan, PA0)with
DEFINE_HEATER(pressure, PA0)

DEFINE_HEATER(relief, PB3) //PB4 for H1 channel, PB3 for H2 channel
Replace
#define HEATER_EXTRUDER HEATER_extruder

#define HEATER_BED HEATER_bed

#define HEATER_FAN HEATER_fan
with
#define HEATER_PRESSURE HEATER_pressure

#define HEATER_RELIEF HEATER_relief - Add M126 and M127 behavioursIn gcode_process.c:
Replace all instances of
HEATER_FANwithHEATER_PRESSUREAt line 610, insert
case 126:

//? --- M126: Open Valve ---

//?

//? Example: M126

//?

//? Open the relief valve.

//?
#ifdef ENFORCE_ORDER
// wait for all moves to complete
queue_wait();
#endif
#ifdef HEATER_VALVE
heater_set(HEATER_VALVE, 255);
#endif
break;case 127:
//? --- M127: Close Valve ---
//?
//? Example: M127
//?
//? Close the relief valve.
//?#ifdef ENFORCE_ORDER
// wait for all moves to complete
queue_wait();
#endif
#ifdef HEATER_VALVE
heater_set(HEATER_VALVE, 0);
#endif
break;
See my version of Teacup for Frostruder on github.
To test, we sent the M106/7 and M126/7 GCode commands and firstly watched for the indicated LEDs to react. Then we connected the solenoid wires to the pins on the heater channels (the outer pins on Gen7 v1.1), there is no polarity, and listened for the valves clicking on and off. Finally we hooked up the compressed air tank and could hear the airflow changing.
Issue 3 – Calibrating the Frostruder. Makerbot has a suite of tools to help calibrate Skeinforge for the Frostruder, charmingly called the “Frostruder Tool Sweet”. The standard version uses comments beginning with “(“, which most RepRap firmwares I have used don’t seem to like. I went through all the different scripts to fix this by replacing all occurrences of “(” with “;(“. See my version of Tool Sweet with Fixed Comments on github.
We worked our way through the Tool Sweet Instructions, using Pronterface rather than ReplicatorG as our host because it was on my laptop and I’ve struggled in the past with ReplicatorG.


At this point Daniel and Ben took over proceedings and spent a little while getting to know Skeinforge, using their Prusa and testing out a variety of different chocolates to find the one with the best properties for printing. Then they were turning out advent calendar pieces at breakneck speed, to try and meet the deadline.
[N.B. the MB Prusa has RAMPS1.2 electronics using Sprinter firmware. They had to make similar alterations as described above to the firmware to get the Frostruder working.]
Their final results were outstanding, especially for the short amount of time allowed, and I had such a great time working with them again on such an exciting project. MB’s write up of the project describes it from an interestingly different “designer’s” perspective.
Don’t forget to check out the calendar website where a new design is revealed every day and the models are available to download. Now I just need to put a Frostruder on my Christmas list!


Hi,
I’m doing an extruder like yours and Frostruder MK2 but I’m not sure how to connect the two solenoid valves with an arduino UNO controller. Could you help me?